Liver Let Dye
As a necropsy technician in the Disease Investigations Lab at the San Diego Zoo, I am frequently asked how the animal carcass on the table eventually becomes a glass slide to be read under a microscope. Identifying gross lesions, or abnormalities visible with the naked eye, at necropsy are often clues to what disease process may be present. However, it would not be effective (or sanitary) to just stick a chunk of liver under a microscope!
In order to really understand what led to disease or death, the veterinary pathologist will need to look closer at the individual cells of the various tissues in order to make a final diagnosis. Have you ever had your appendix or a mole on your arm removed? Much like these tissues that are commonly removed from humans, tissues from all species, from a tiny Panamanian golden frog to a huge African elephant, travel through the same process before a diagnosis is reached.
So how do these tissues end up on a glass slide on the pathologist’s desk? Let me take you through this detailed and fascinating adventure as we follow the (after) life of a tissue as it makes its way from body to slide.
Chapter l: The Necropsy
I am a vital organ; my proper function is essential for life. A few of my jobs include processing nutrients, removing toxins, and producing proteins. What am I? I’m a liver, and after a long life inside, I’m about to be exposed to the light! The necropsy technician, using a scalpel or knife, carefully opens up the body cavity of the animal in which I reside by reflecting back the skin and limbs. When the muscles of the abdominal wall are removed, the abdominal organs (of which I am one) become visible.
Carefully the prosector begins removing other vital organs surrounding me so that I am finally revealed. Like my fellow organs, I am removed from the body and sectioned like a bread loaf to see if I have any gross lesions (masses, discolorations, etc). Several representative pieces, measuring no more than 1 cm thick, will be placed into a 10% formalin solution, which will preserve my cells and prevent further postmortem breakdown, or autolysis. I then sit in the bucket of formalin with my comrades (kidney, brain, heart, etc.) until I have fully absorbed the formalin and am ready for further sectioning.
Chapter II: The Trimming
Once fixed, I am laid out on a cutting board, cut into smaller pieces about the thickness of a nickel, and placed flat in a colorful plastic cassette with open slats that allow fluids to be easily exchanged (see Image 1 below). Next stop, the tissue processor!
Chapter III: The Chemicals
In my cassette, I am transported into a metallic chamber in the processor where I sit bathing for almost 12 hours. This bath is filled and emptied with several different clear, highly aromatic chemicals: first increasing concentrations of alcohol to remove all the water, next xylene to allow penetration of paraffin, and finally perfusion with warm fluid paraffin wax.
Chapter IV: The Mold and the Blade
I am in the hands of a skilled histotechnician now. Completely dehydrated and permeated by paraffin, this piece of liver is removed from the cassette and placed into a silver metallic mold filled with more warm paraffin. Once surrounded by this paraffin, I sit on a cold plate so the paraffin becomes hard all around me, transforming me into a “block.” This block is inserted into a holding device on the microtome (Image 2 below) where an extremely sharp, double-edged blade carefully trims layers of tissue and surrounding wax into very thin ribbons measuring just 5 micrometers thick – that is thinner than tissue paper! In ribbon form, the histotech floats me on top of a warm water bath from which I am quickly, deftly picked up by a glass slide (Image 3 below).
Chapter V: The Staining
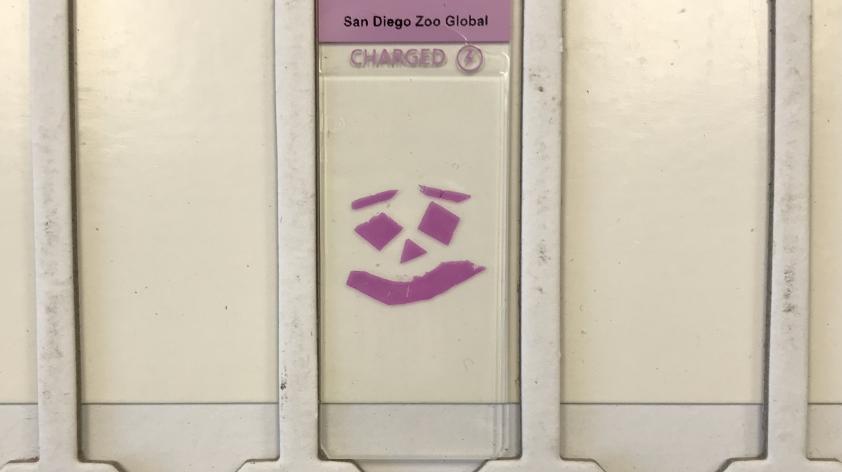
I am now officially tissue on a glass slide, but I am no use to the pathologist yet. Except for some natural pigments, like hemoglobin or melanin, I am completely colorless in this thin state. It’s time for some dipping in hematoxylin and eosin, which will stain my cellular components mixes of bright pink and rich purple, accentuating the details of my liver-ness. A final layer of glue and glass coverslip on top for lasting protection, and I am finally ready for the pathologist’s desk (Image 4 below).
Epilogue: Ever After
Light microscopic examination of liver and other tissues prepared in this labor-intensive manner is a key component of a thorough postmortem examination. At the San Diego Zoo, we perform all of these steps in-house as part of one of the largest zoo pathology services in the world. After diagnosis, our friend the liver’s final resting place is our museum-accredited slide archive. Among the rows of heavy green towers, each slide endures as a valuable learning and research tool in the conservation of endangered species.


